ESP32 Camera Timelapse
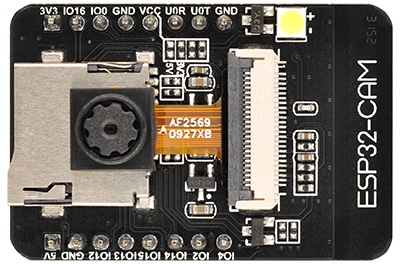
Time-lapse photography is a technique that combines a series of photos taken at fixed intervals into a video, often used to display changes difficult to perceive with the naked eye or the dynamic processes of the natural environment. This article will use the ESP32-CAM (Ai-Thinker) development board to create time-lapse videos.
If you want to implement timed shooting and save photos to an SD card through programming, you will need some foundation in ESP32 programming. You can refer to the introductory tutorial: Programming ESP32 Camera with Arduino IDE.
Here, we will choose a simpler method that requires no programming: using the Node-Camera firmware (Online Installation). The Node-Camera User Manual provides details on the firmware features.
To achieve timed shooting via the firmware, only a few simple settings are required:
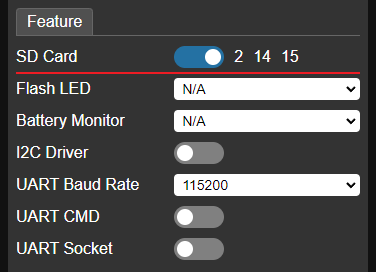
Enable SD card support in the Feature tab of the system settings interface.
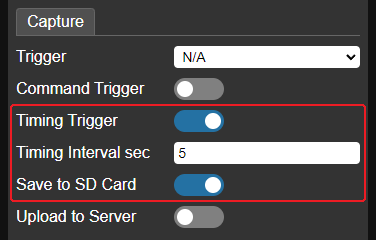
In the Capture tab, enable timed capture (Timing Trigger), set the interval (e.g., 5 seconds), and enable the Save to SD Card option.
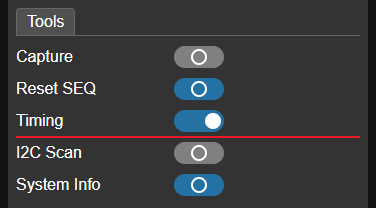
Save and reboot to apply the settings. Then, go to the settings interface and turn on Timing in the Tools tab. The firmware will begin taking photos at the set interval and saving them to the SD card. To stop shooting, simply turn off Timing. Captured photos can be viewed in the SD card interface.
Once shooting is complete, the photos need to be compiled into a video. The most direct way is to remove the SD card, copy the photos to a computer, and use video editing software. Many similar tutorials are available online for reference.
However, we will use a method that might seem more complex but is actually much more efficient, using a script to automate two steps:
- Download all photos from the SD card via the Wi-Fi network (without removing the SD card).
- Compile the downloaded photos into a video.
Scripts are a concise and practical way to automate tasks. While a script doesn't implement complex logic itself, it can call external programs and chain their functions together to complete specific tasks.
In this case, our script calls two external programs:
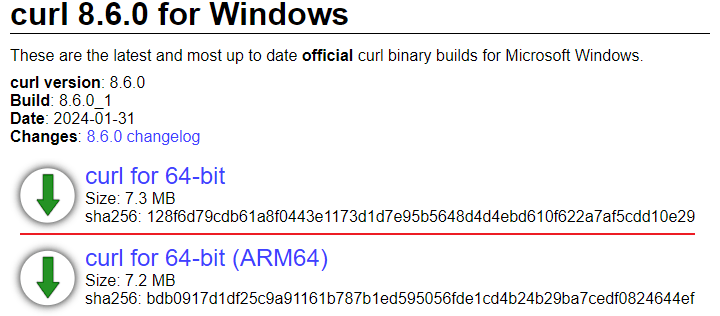
- curl - used to download the photos.
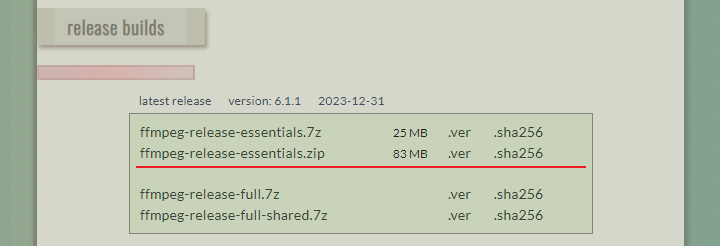
- ffmpeg - used to compile the video.
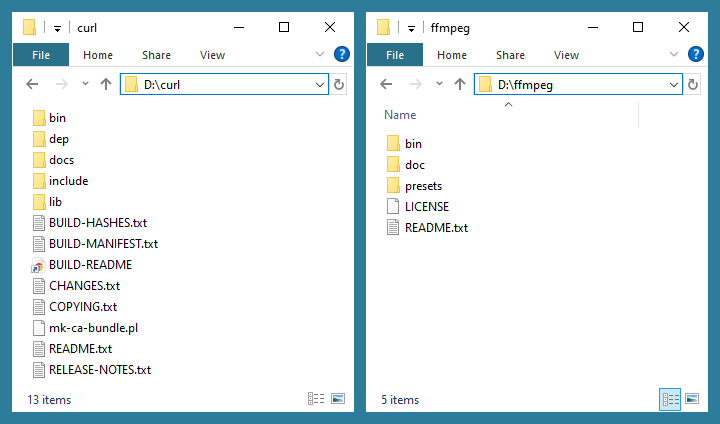
Neither program requires installation, simply extract the downloaded zip files to a specified directory.
curl download: https://curl.se/windows/
ffmpeg download: https://www.gyan.dev/ffmpeg/builds/
Assuming curl is extracted to D:\curl and ffmpeg to D:\ffmpeg, the directory structure should look like this:
To allow the script to call these programs, you must add the paths of the executable files to the Windows Path environment variable.
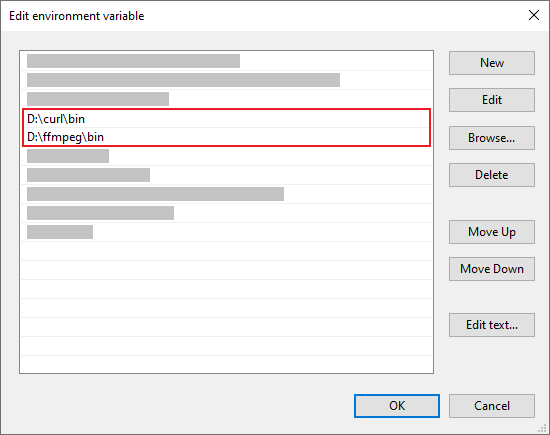
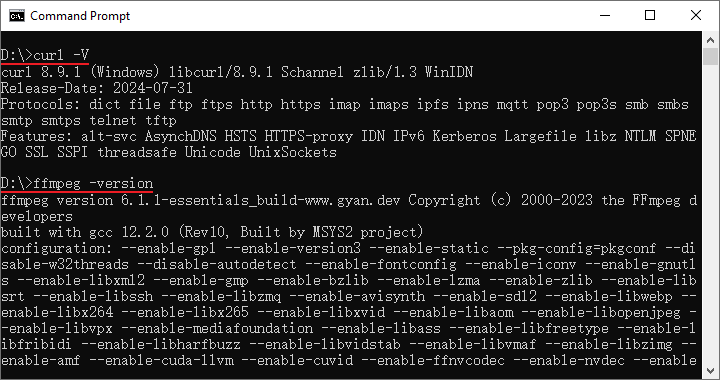
After completing these steps, open a command prompt and run curl -V and ffmpeg -version. If the version information appears correctly, the configuration is successful.
The final script can be downloaded here. It is recommended to extract it into its own directory (e.g., D:\lapse). It contains three script files:
lapse.cmd– Downloads photos and compiles the video.download.cmd– Downloads photos to a specified directory only.order.cmd– Renames photos into a continuous numerical sequence based on their capture order. ffmpeg requires consecutively numbered filenames to compile a video, if you delete unwanted photos, the sequence will break. This script fixes the sequence for ffmpeg.
Before running the script, please modify its variables to match your setup, including the IP address of Node-Camera, the directory for saving photos, and the output video file name.
@echo off
setlocal enabledelayedexpansion

:: Replace IP with the actual IP of Node-Camera
set "host=http://192.168.1.100"

:: Local directory to save downloaded photos
set "localpath=photos"

:: Output video file name
set "output=out.mp4"
...
Scripts can be executed from the command line or by double-clicking them.
If no further processing of the photos is required, simply run lapse.cmd to automatically download and compile the video. The following video was generated from 250 photos taken at 5-second intervals.
- To maintain consistent color and lighting in the final video, it is recommended to turn off Auto White Balance (AWB) or select a fixed mode in the camera settings. You should also turn off Auto Exposure (AEC) and manually set the Exposure based on the ambient brightness.
- Before you start shooting, it is recommended to use the Reset SEQ button in the Tools tab to reset the filename sequence. This ensures photos are named starting from
IMG_0000.JPG, making them easier to process.
Alternatively, you can run download.cmd first to download the photos from the SD card, perform any manual edits, run order.cmd to renumber the file names, and then use ffmpeg via the command line to compile the video:
ffmpeg -framerate 24 -i "photos\IMG_%04d.JPG" -c:v libx264 -pix_fmt yuv420p out.mp4Finally, the script files include detailed comments in case you want to customize or extend them.