Node-Camera is firmware that runs on ESP32 camera modules. It allows users to flexibly configure hardware resources and deploy the camera module in real-world projects without writing any code. The firmware offers a rich set of configurable features and flexible control options, including:
- Network configuration
- Camera settings
- Photo/video interface
- Face detection
- QR code recognition
- Network time sync
- mDNS support
- Snapshot settings
- SD card storage
- FTP upload
- GPIO/PWM control
- Serial-WebSocket bridge
- Servo/motor control
- PCA9685 expansion support
- Configurable console UI
- … and more
For complete documentation, see the Node-Camera User Manual.
Online Installation
Firmware v1.2.0 is available for a one-time $3 fee (includes free updates). To install Node-Camera, simply connect your device and follow the on-screen instructions to complete the steps below:
Select module and connect
Install firmware
Pay online (via PayPal)
Activate firmware
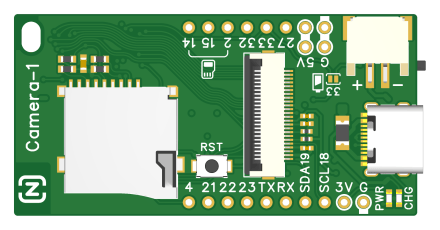
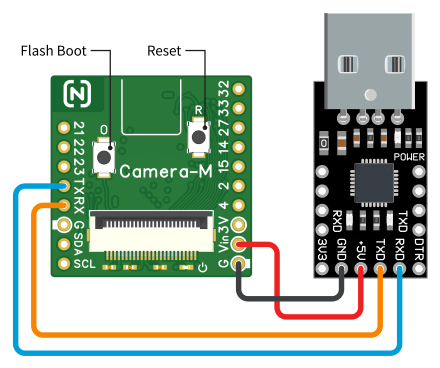
Select a module to install:
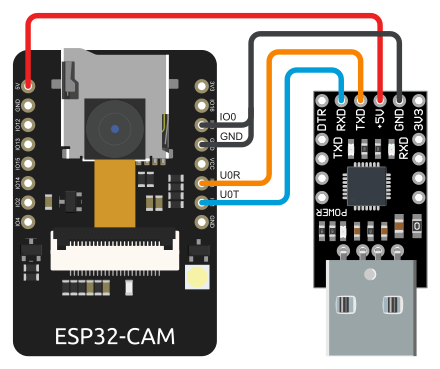
- The ESP32-CAM module needs to be connected to your computer’s USB port through a USB serial adapter. You can use common adapters such as CP2102, CH340. The adapter connection is shown in the figure.
- After connecting to your computer’s USB port, you need to boot the module into BOOT mode. Operation method:
Connect the IO0 pin of the module to GND; press and release the RST key. The module will boot into BOOT mode. - Click CONNECT and select COM port ➜
I’ve accidentally overwritten the Node-Camera firmware on my module. Can I get a free reinstallation?
Yes, you can. The installer will automatically recognize your device and allow for a free reinstall.